Ways and Methods to Access and Customize Reports & Experiences
Inside your DNA Web App account, you can configure settings to customize the reports for your desired experience. Explore the options to configure reports available for participants and in the app.
Configuring Participant Specific Reports:
Reports provided automatically via Self Registration:
Reports are provided to participants when they complete the self registration process. Users of the DNA App can configure which insights are available to the participants per self registration link. This provides users with a very scalable approach to provide different groups of participants, different reports.
Generating participant individual reports from the DNA Web App:
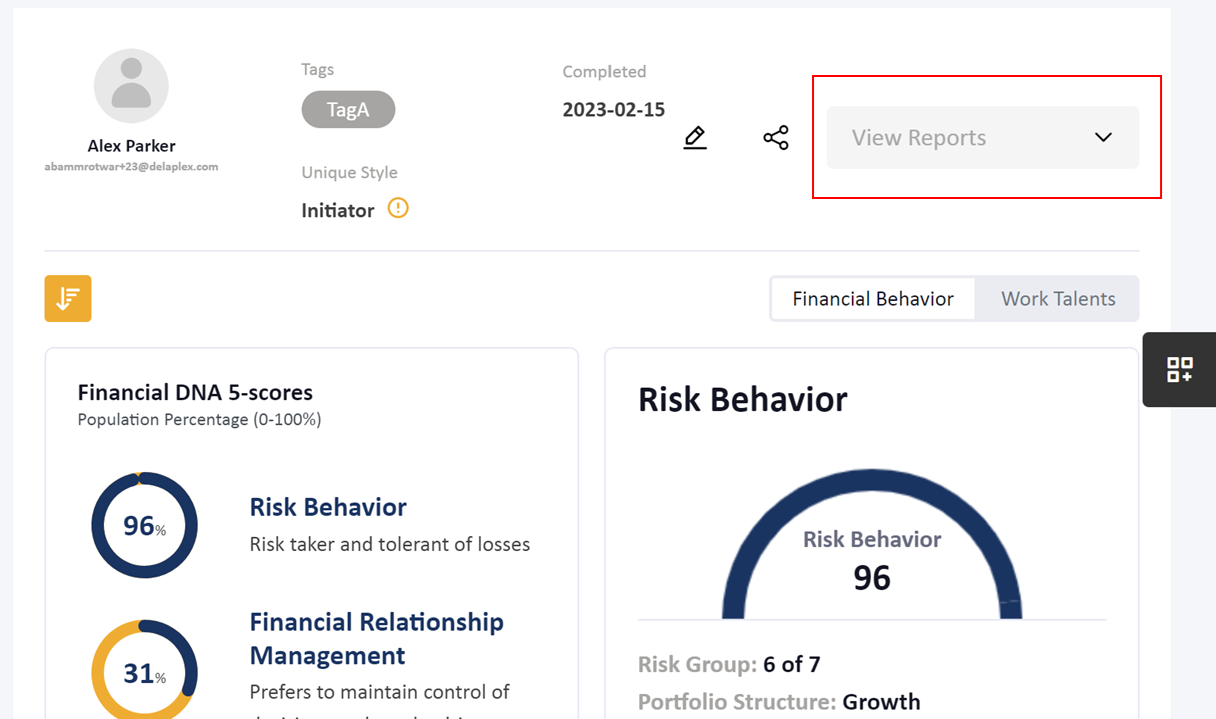
Are you looking to download a PDF report for a participant with the insights that are available to them when they complete the discovery? You can generate a report using the "View Reports" button that is on the User page for any participant that has a completed Natural Behavior discovery. Next, select the Participant Report button on the User page. 
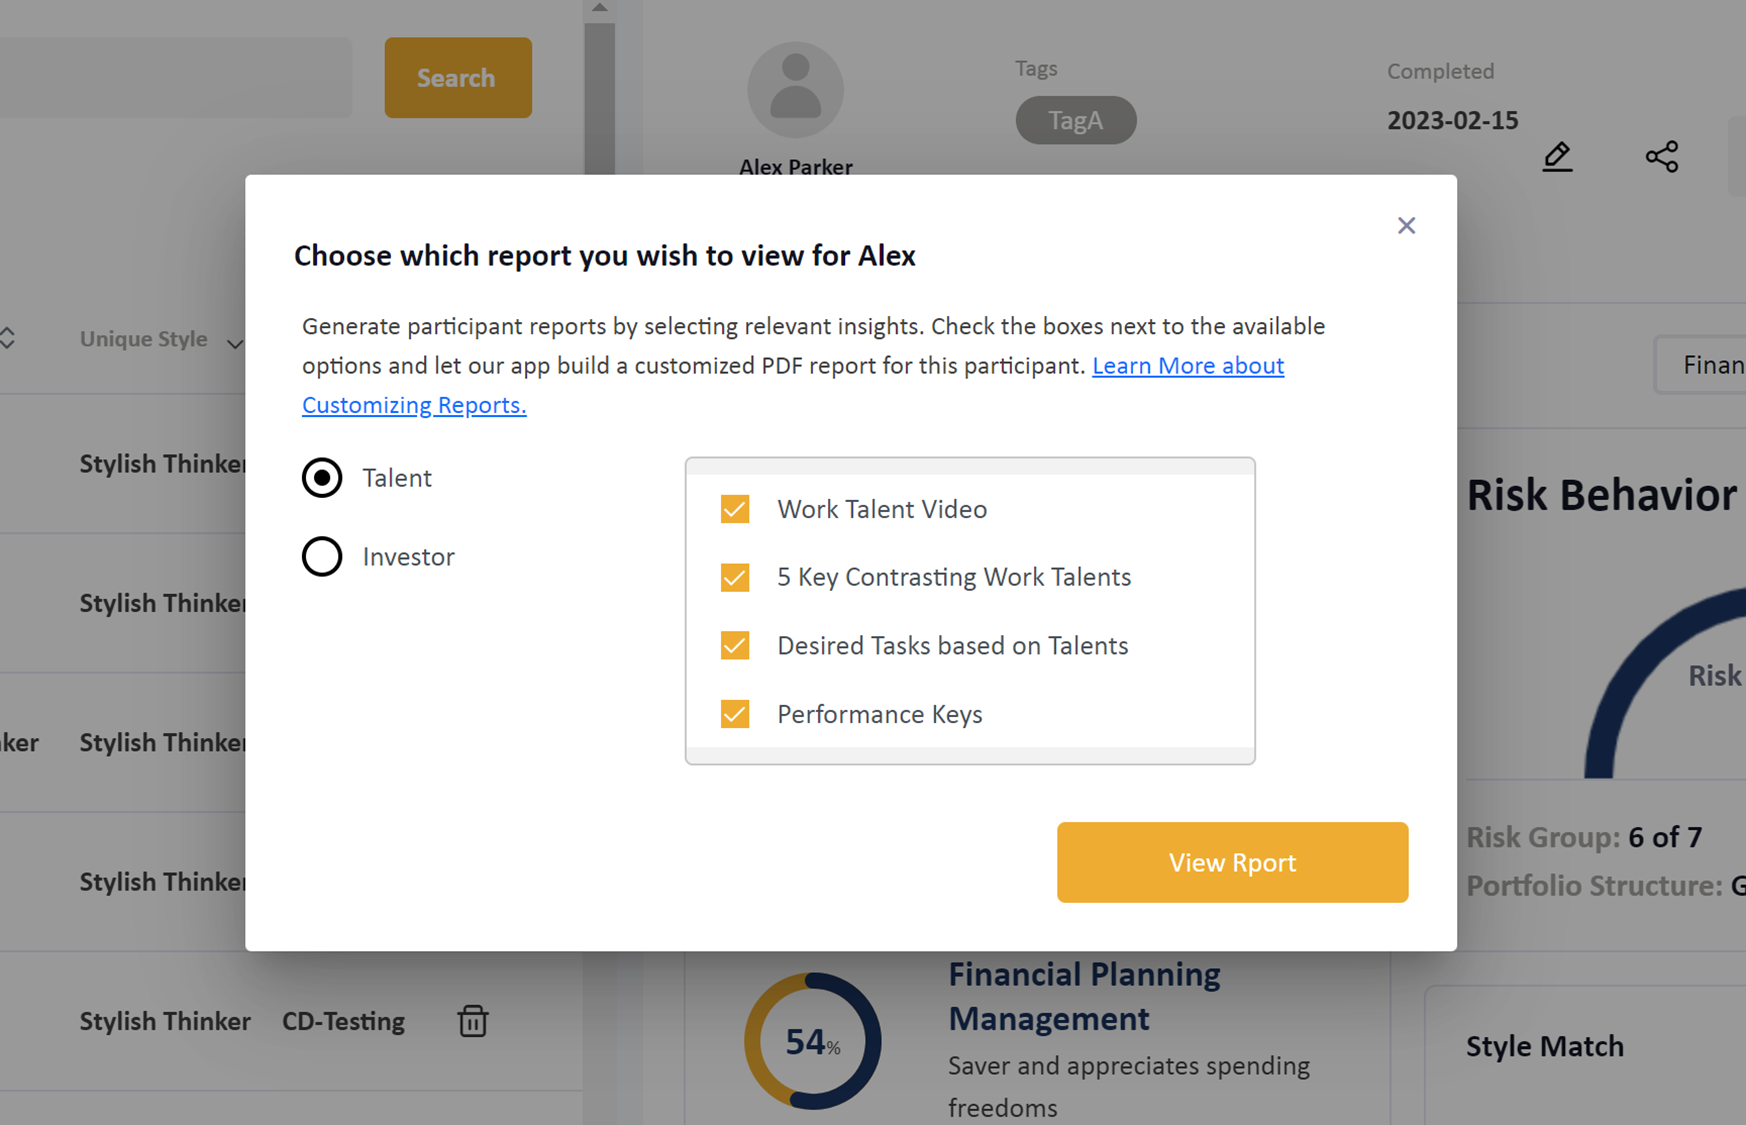
Choose the report format (Talent for Work Talents or Investor for the Financial Behavior Report) and then choose the report insights you wish to include in the PDF in the pop-up menu provided. The report will generate immediately by pressing "View Report".

Account Settings to customize the reports:
Apply your logo to the report cover pages:
In the DNA App, there is one location to upload your logo. This one field will apply your logo to the web screens and report cover pages automatically. Only one logo is allowed per account. If you wish to highlight a different logo for a specific client project, you can create an additional account. Upload your logo on the Settings page to get started.
Changing the report colors:
In the DNA App, there is one location to upload a primary and secondary color to your account. These colors power the on-screen experience as well as customize your reports. Visit this article to learn more about the colors and how to adapt them to your account.
Customizing the report names:
With the DNA App, you can customize the names of participants, comparisons, and team reports to make them more personalized and easier to identify. Here are the steps to follow in order to customize the report names:
Step 1: Navigate to the Reports Settings
To customize the names of your reports, you need to access the Reports Settings. To do this, log in to your DNA account and click on the Settings menu item. Then, click on Reports in the left-hand menu.
Step 2: Customize the Report Name
Once you are in the Reports Settings, select the report type that you want to customize (participant, comparison, or team report). Click on the Edit button to bring up the Report Name field. Enter the desired report name in this field. Note that the maximum character length is 50 characters, and no special characters are allowed.
For example, if you want to name your participant report "John Smith's Performance Report", simply enter "John Smith's Performance" in the Report Name field. The word "Report" will be added automatically to the end of your report name.

Step 3: Save Your Changes
Once you have entered the desired report name, click the Save button to apply your changes. Your report will now be customized with the new name you have chosen.
Which Reports can have customized names:
The following reports can have customized names in the DNA Web App:
- Comparison Report
- Team Report
- Work Talent Report
- Financial Behavior Report
At the time of its release, the Factor and Subfactor Report did not have a customized name available. If you wish for us to develop this feature, suggest it as a feature upgrade.
Are you looking for this feature inside your account but don't see it on the Settings page? This is a premium feature and not available in all of the subscription packages. Explore the package options here: Platform Pricing
Still Need Help?
Submit a ticket here.
![DNA-B-Primary_White (7).png]](https://kb.dnabehavior.com/hs-fs/hubfs/DNA-B-Primary_White%20(7).png?height=50&name=DNA-B-Primary_White%20(7).png)