![DNA-B-Primary_White (7).png]](https://kb.dnabehavior.com/hs-fs/hubfs/DNA-B-Primary_White%20(7).png?height=50&name=DNA-B-Primary_White%20(7).png)
Here's a simple step-by-step guide on how to locate the assigned Sales Representative for a specific client:
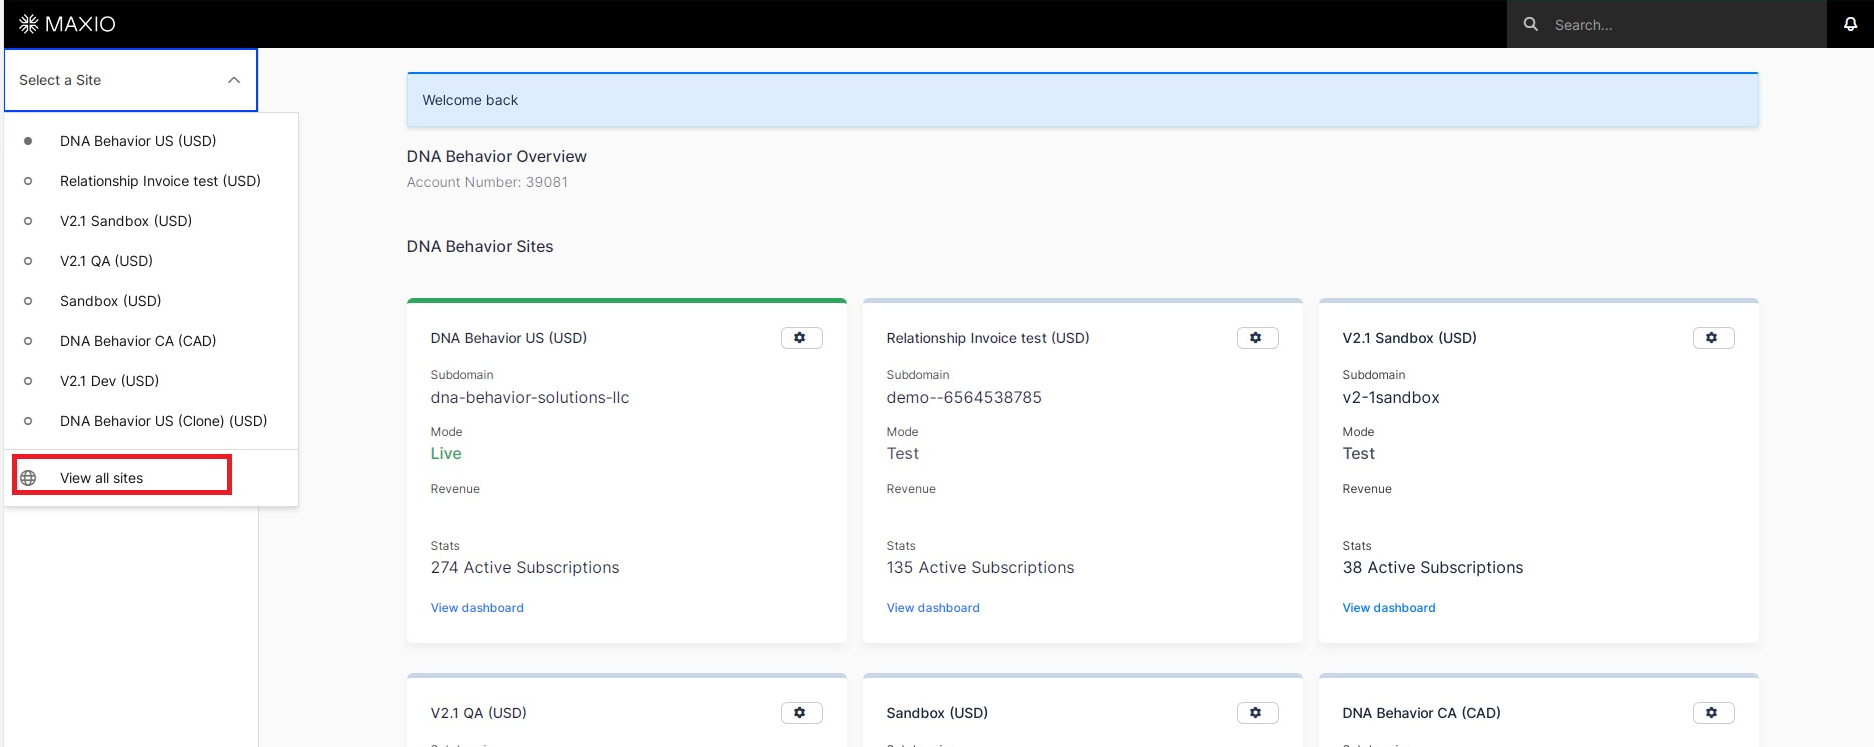
Step 1: Open Chargify
- Start by logging into your Chargify account using your credentials. Once logged in, you'll land on the Chargify dashboard.
Step 2: Click All Sites
- In the dashboard, locate and click on the "All Sites" option. This will lead you to a list of all the sites or clients you're managing.
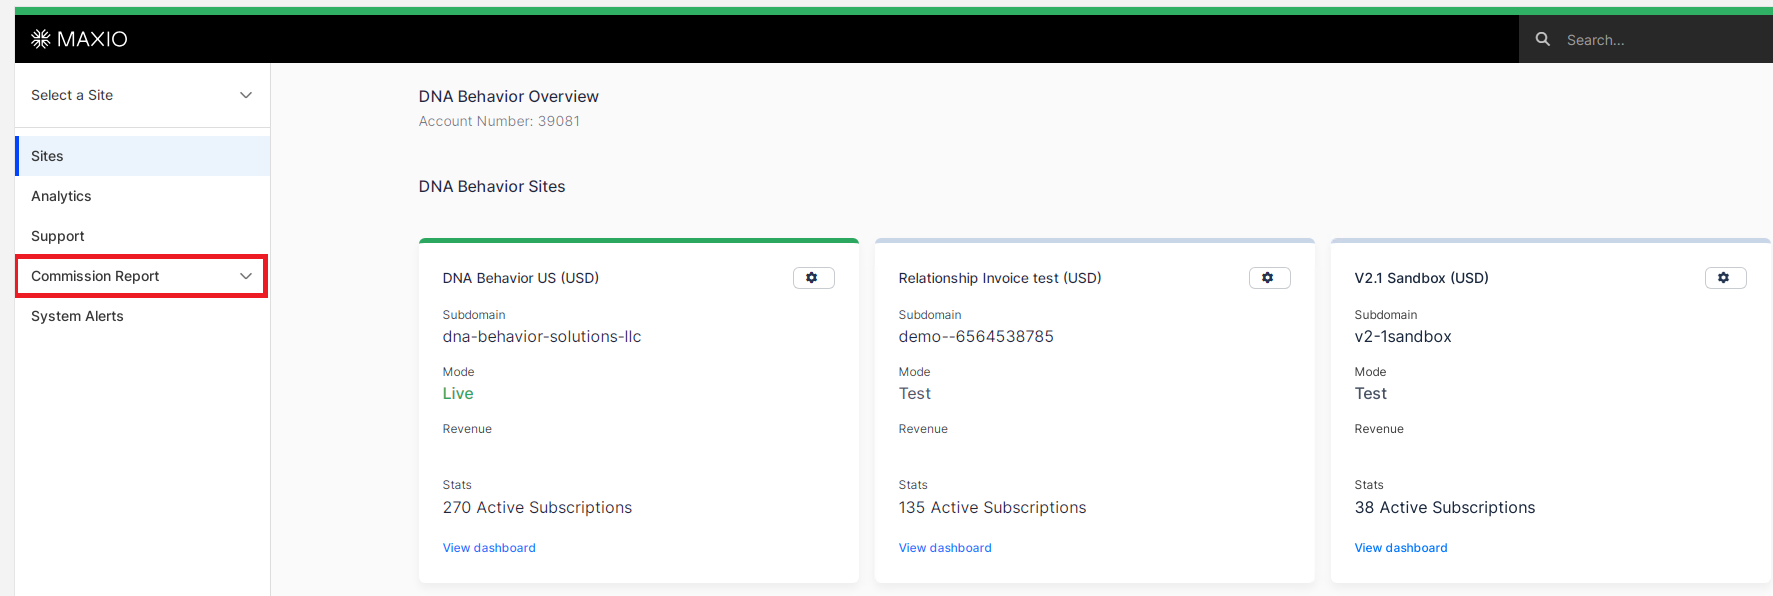
Step 3: Access the Commission Report
- In the "All Sites" section, you'll find the Commission Report. Click on the drop-down menu associated with the Commission Report to access additional options.
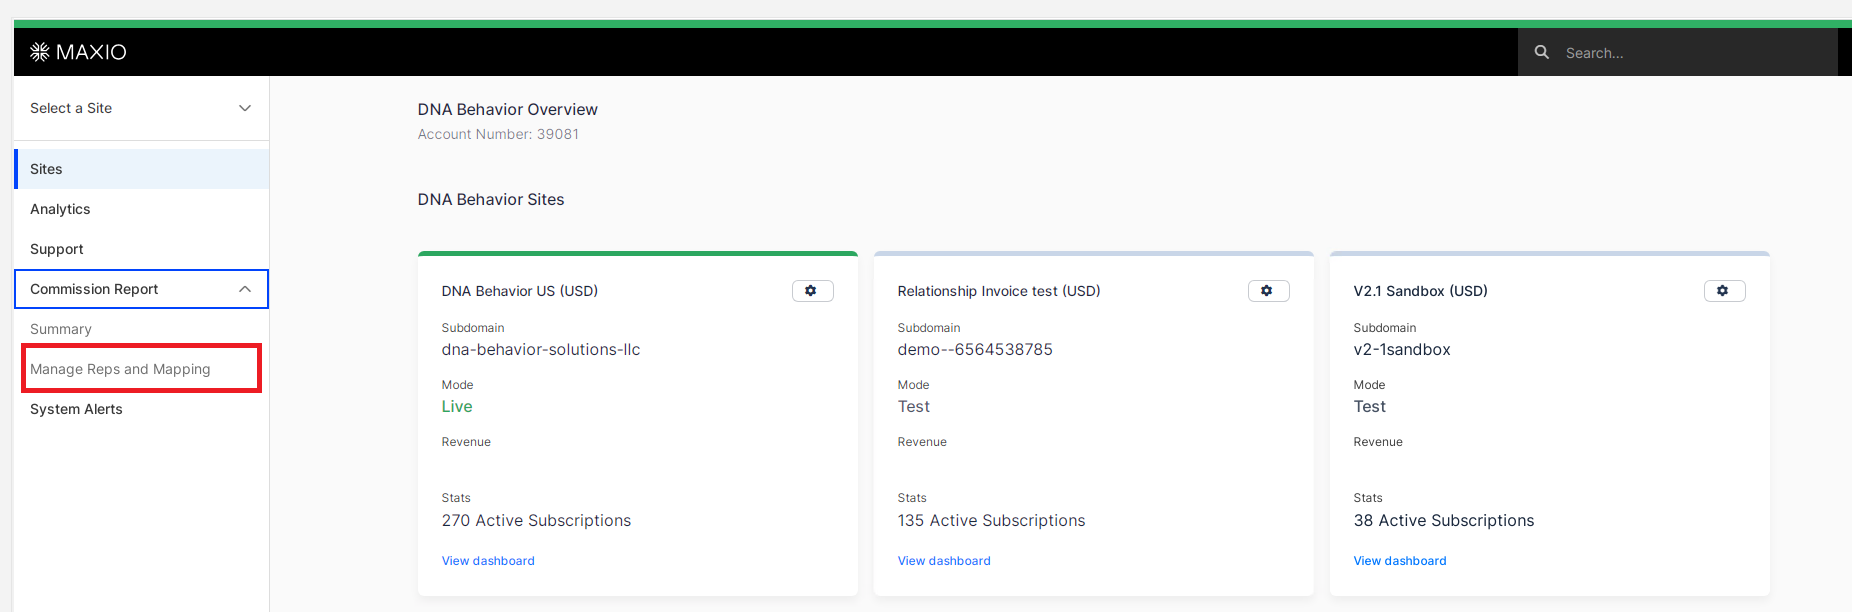
Step 4: Select "Manage Reps and Mapping"
- Among the options in the Commission Report drop-down menu, you'll find "Manage Reps and Mapping." Select this option to proceed.
Step 5: Search for the Client
- In the "Manage Reps" section, you'll find a search or filter bar. Use this search bar to locate the specific client for whom you want to find the assigned Sales Representative. You can search by client name or any relevant identifier.
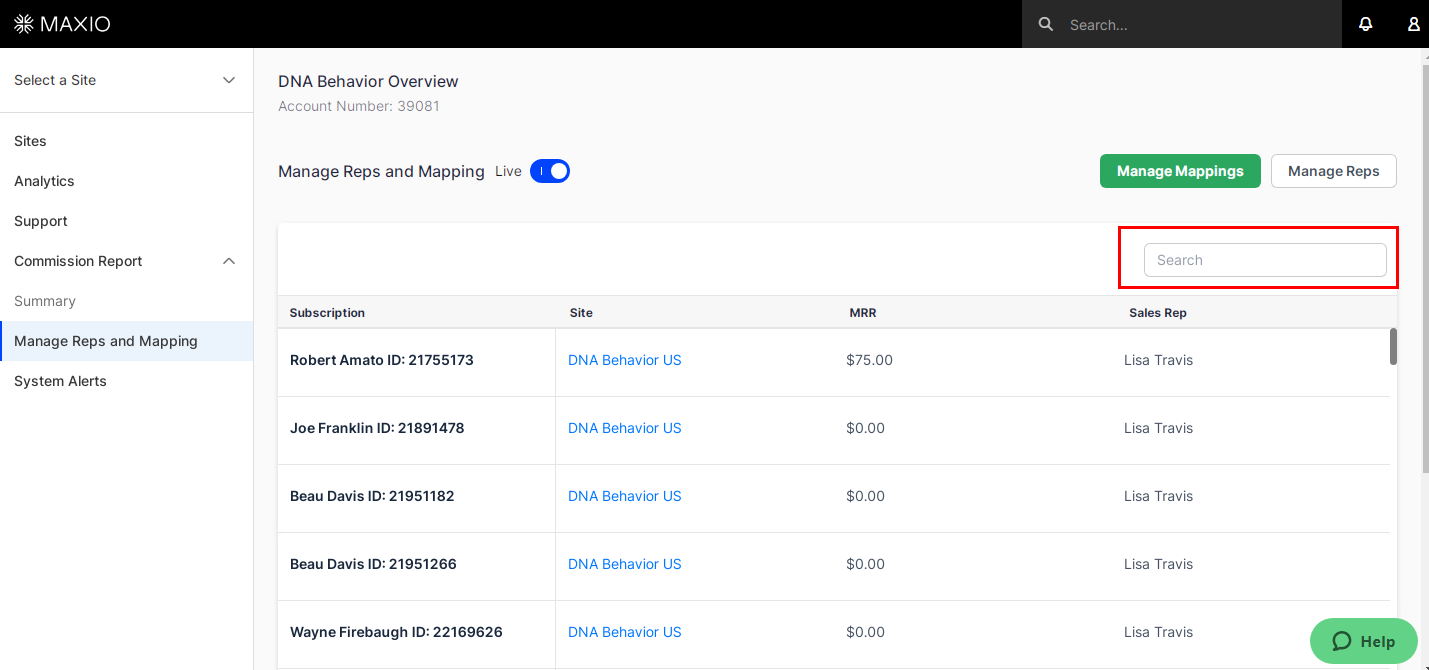
Step 6: View Assigned Sales Representative
- Once you've found the client, the system will display the assigned Sales Representative for that particular client. This information can be used for various purposes, including commission tracking and client management.

By following these straightforward steps, you can easily locate the Sales Representative assigned to any client in Chargify. This knowledge is valuable for maintaining effective client relationships and managing commissions accurately within your operations.